ETLB Squawk Forums — Archive

Community archive · preserved 1076 threads
Building and Flying Related Boards › miniMax, Hi-Max, and AirBike General Discussions
rib stitching brain teasing question
13 posts
kfbSeptember 10, 2018, 7:34pm
Hi
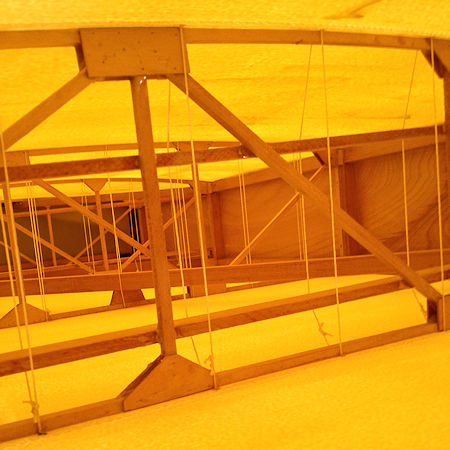
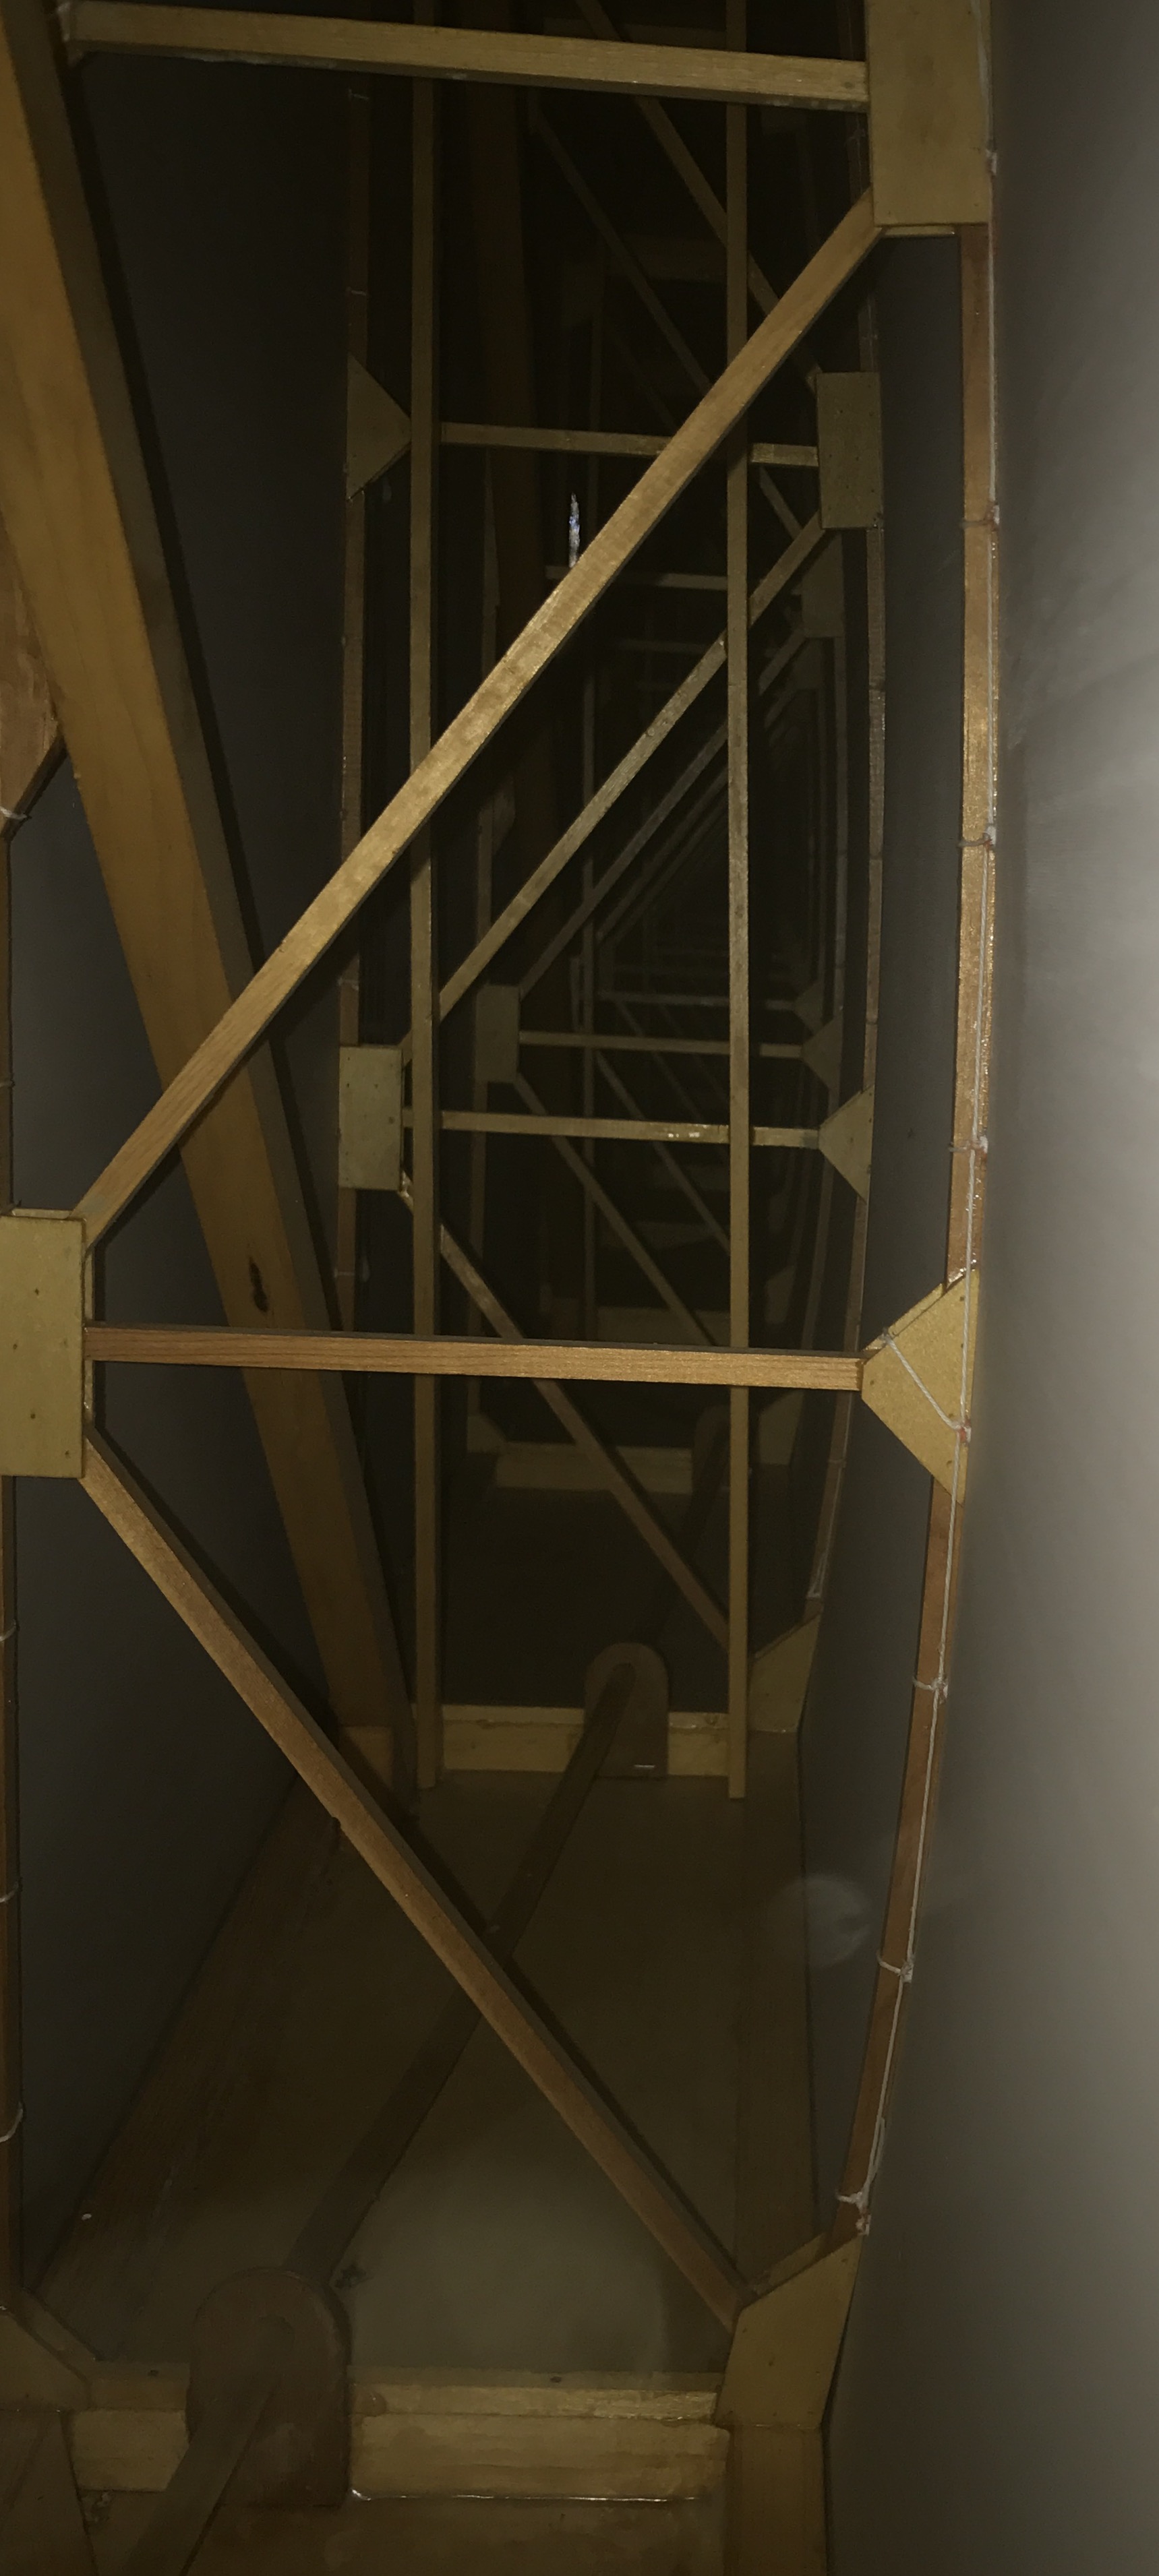
I'm starting to get the first Max wing finished and prepped for fabric even though  I actually won't do the fabric until I get the second wing ready(I want to be able to use the first wing as a reference when doing the second one), but it does cause me to wonder about the following "brain teaser food for thought type question" for which I need to elaborate a bit:

It is my intention to rib stitch these wings, and this post isn't to get into the debate of whether or not that is necessary.  My question pertains to the steps typically involved in rib stitching.  I've done my share of fabric work and have, in the past, always run the needle from bottom to top and back to bottom, adjacent to each side of a rib.  When you encounter an obstacle, you can stitch only with the top rib if necessary as it is better than nothing.  What I have noticed is that when just using the top of the rib while using a curved needle, one man can do a stitch in seconds, when going around both ribs, if alone, it takes considerable longer and may entail walking to the other side of the wing. It would appear to me that going around both upper and lower parts of a rib would result in more strength available to that knot than would be available to it if you went only under the top of the rib.  Now if the glue joints are excellent, I think you don't lose that much strength as the geometry of the rib structure is all still available.  I have been meaning to run this comparison by a pilot mechanical engineer of my acquaintance but have not run into lately.  I think, especially for aircraft that probably spend their lives under 70mph, rib stitching using only the top part of the rib is satisfactory.  
Anyway, when I get to that point, I am going to stitch using only the top of the rib.  Any and all comments relevant to the subject of top only versus full rib stitching are found to be interesting and they are appreciated.
Kim Brown
New Hampshire
Bob DalySeptember 10, 2018, 10:41pm
Why does the size of the loop of string matter?  In either case, the load is being applied to the 1/4" rib cap strip.
StilsonSeptember 10, 2018, 11:30pm
From experience, I started stitching the first rib top to bottom, got half way and stopped, cut it out, and stitched just to top cap (and bottom cap since id already made the holes for top to bottom).  The 1/4" cap wants to deform when pulling the knots tight (beech staggerwing knot).  
ulbuilderSeptember 11, 2018, 11:12pm
I stitched top to bottom, made a custom curved needle out of music wire to get around the compression members on every other rib.

You can read about why and how I did the stitching here:
[url]https://ulbuilder.wordpress.com/2016/07/25/rib-stitching/
[/url]

At the very bottom of the article is a video on how to tie the knots.
Bill MetcalfSeptember 12, 2018, 2:22pm
The easy way: Individual loops


attachment
PUFFSeptember 13, 2018, 11:30am
Yeah, but how'd you get the knots on the inside?
Bill MetcalfSeptember 13, 2018, 2:11pm
The knot is tied and then the loop is rotated to pull it inside
aeronutSeptember 13, 2018, 3:53pm
Use the eye of the needle to push the knot back down inside the wing then trim the ends of the rib stitching cord close to the surface of the wing and poke the ends below the surface of the wing. You need to hold onto the tag end of the stitch as you push the eye back down into the wing. That is how I did it. If you leave the knot on the outside it should be on the bottom of the wing not the top.
never surrender; never give-up
Bob DalySeptember 13, 2018, 7:55pm
We never really answered Kim's question so I'll elaborate on my comment.  The string is going to go around the rib cap in either case and apply a point load there.  Looking at Bill's picture, the test case is the stitch loop centered more or less between the rib uprights.  Here, the rib cap is a simple beam supported at the "ends" attached to the uprights.  This is the case whether we're talking about the lower cap in the event the stitch goes around the entire rib, or the upper cap with a stitch only around that cap.  So the cap or beam must support the point load near the middle of that span.  The beam load equations are easily found and the maximum bending moment equation is what we want.  The maximum bending depends on the length of the beam and the magnitude of the point load.  The point load will have to be determined from the rib loading.  If the takeoff weight is 560 lbs and the wings weigh 80lbs and there are 10 ribs per wing then the rib loading is about 3 lbs/inch.  If the stitches are 4" apart then our 8" long 1/4" spruce beam must support 12 lbs pulling on the stitch in the center. The stress at the center can be calculated and I get 9216 psi.  The modulus of rupture for spruce is 10,200 psi so we should be good.  The upshot of this is more stitches are better because the distributed load bending stress is much lower.
StilsonSeptember 14, 2018, 2:44am
Caps only


attachment
StilsonSeptember 14, 2018, 2:47am
The original stits covering was glued only, it failed on 6 ribs by 1000 hours.
kfbSeptember 14, 2018, 2:23pm
Bob
Thanks for the great, technical answer, it was exactly what I was actually looking for.  Printed it out and read it a few times before I started to have an idea of what you were saying.  So one point I also got, I think, is that there is not much difference between wrapping the string around upper and lower rib members and wrapping it around only the upper member for instance.  In either case, you only get the benefit of one member of the rib, be it upper or lower.  Seemingly the only way to get the benefit of both upper and lower would be to knot the "full loop" string to both upper and lower rib members.  Then an upward pull on the upper rib due to low pressure air flow would result in pull being exerted on both upper and lower rib members.  And the more is better concept you mentioned, putting the stitches closer together, is great info.  

Seems as if doing a wing with top only stitches, and I will do individual pieces of thread rather than the continuous thread approach, is going to be adequate.  I will probably go to a closer stitch pattern than I might have before seeing your post.  Anyway, thanks for great info
Kim Brown
New Hampshire
Bob DalySeptember 14, 2018, 6:41pm
Quoted from kfb
  Seemingly the only way to get the benefit of both upper and lower would be to knot the "full loop" string to both upper and lower rib members.  Then an upward pull on the upper rib due to low pressure air flow would result in pull being exerted on both upper and lower rib members.


This would be very difficult to do because the inter-cap string would only help once the top cap was deflected due to stress and only slightly even then unless you could get it very tight initially, pre-loaded so to speak.

Quoted from kfb
  And the more is better concept you mentioned, putting the stitches closer together, is great info.  


The maximum bending moment for the point load centered on our little beam is exactly twice the maximum bending moment of a comparable uniformly distributed load (where the fabric glue does the work).  So the more point loads closer together you have the closer you get to the distributed load situation and the lower the maximum bending in the beam. Here are the equations needed:
https://www.linsgroup.com/MECHANICAL_DESIGN/Beam/beam_formula.htm
Quoted from kfb
Seems as if doing a wing with top only stitches, and I will do individual pieces of thread rather than the continuous thread approach, is going to be adequate.


I believe the advantage of the continuous thread is the knots can't become untied.  The individual knots might untie themselves if not done well.